



At this point, we’ve created your blog, set it up, and even written some content. That means two things:
One, we’re ready to launch!
And two, it’s time to start thinking about how to get people to come to your blog and read it.
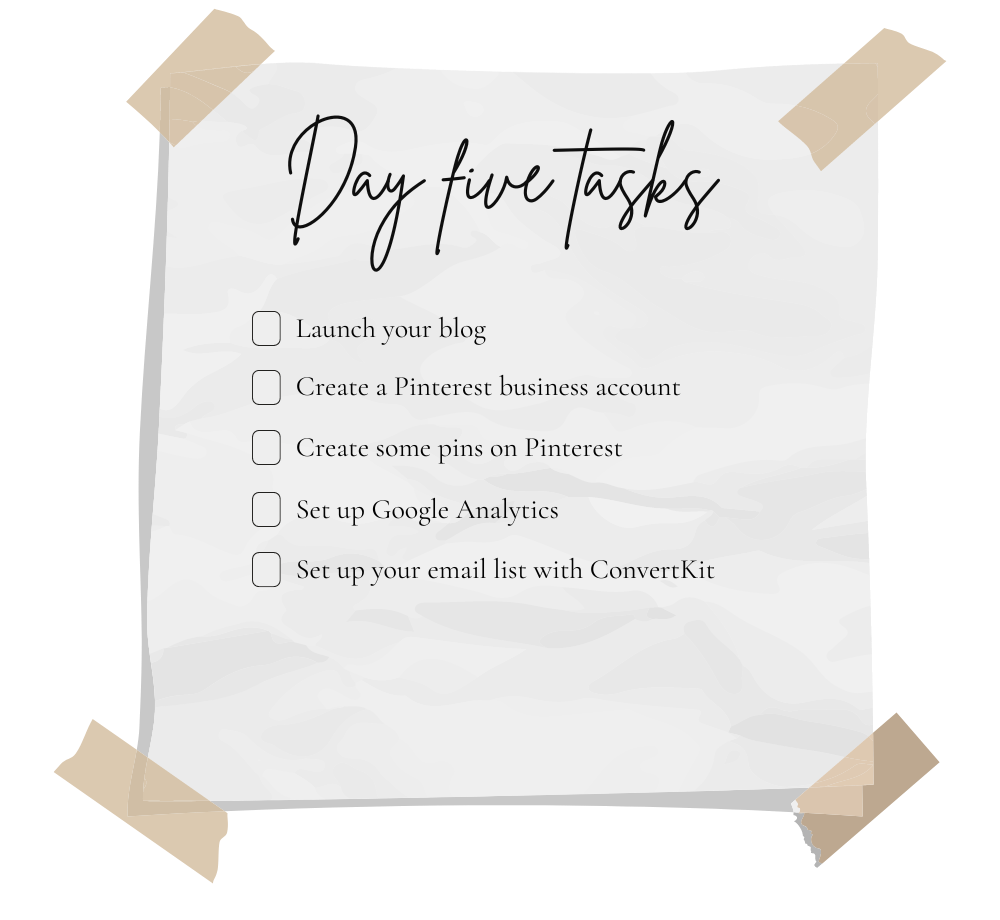
That’s exactly what we’re going to do in todays lesson. We will:
- (officially) launch your blog
- Set up Pinterest and learn how to use it
- Set up Google Analytics
- Set up your email list
Let’s launch your blog
Even though we’ve set up your blog and added content, it may not be actually visible to anyone yet. That’s because when you start on Bluehost they put you in “maintenance mode” until you are ready to go. Which is, now!
At this point, if you skipped the step of choosing and setting up your domain, you need to go back and do that before moving on.
To launch your blog and make it visible to the public, follow these steps:
- Login to your WordPress dashboard
- Click on the Bluehost icon on the left hand side
- Click the yellow button that says “Launch your site”
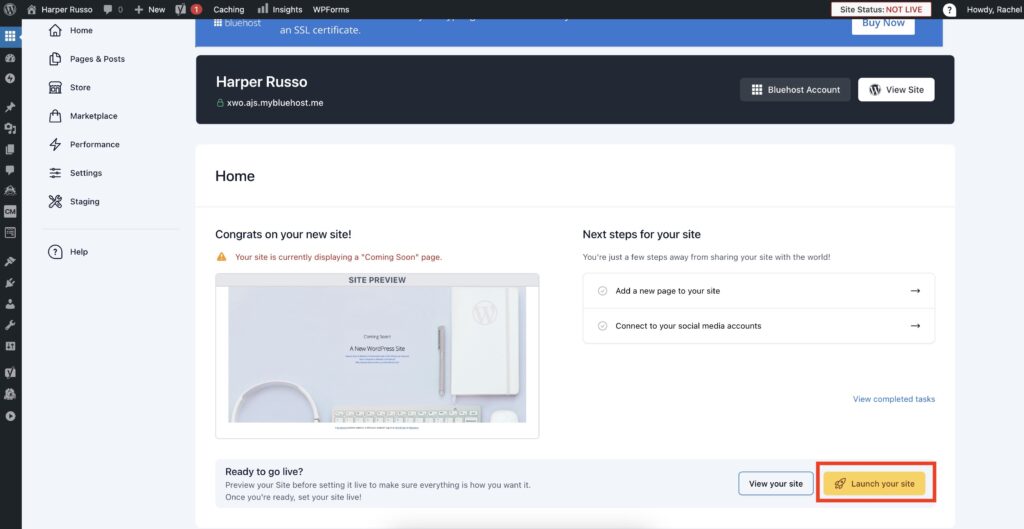
Voila! You should see a message that your blog is now visible to the public.
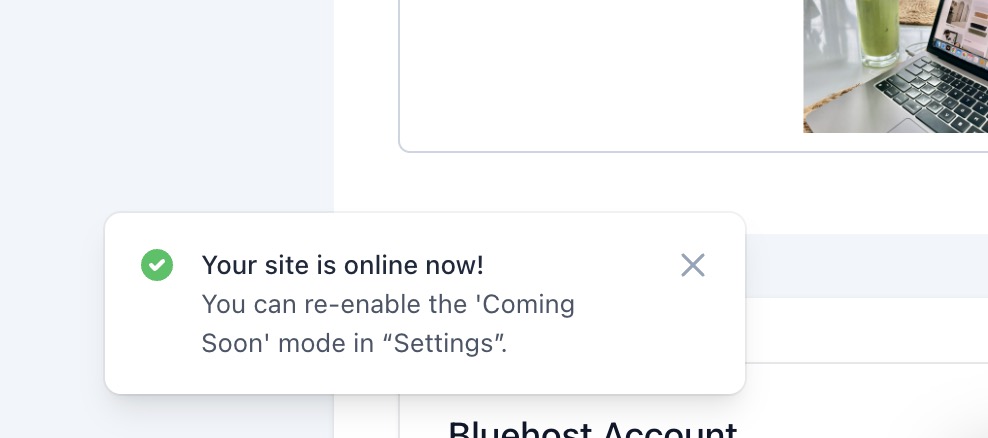
You can go back to settings in the left hand panel to change this back if you need to. Very few things are permanent in blogging 😊
If you don’t feel 100% ready, don’t fret. Remember no one is really going to see this yet unless you send them a direct link or something. It can feel kind of scary publishing your blog to the world but it’s important to remember the internet is a big place!
The likelihood of your friends or coworkers “finding” you in the beginning is pretty small. You’re going to have to be intentional to actually get traffic to your blog.
Which is what we’ll do next.
Setting up Pinterest
Pinterest is my #1 traffic source for my blog, and this is the case for many many lifestyle bloggers I know.
Even though we think of Pinterest as social media, it is actually more like a visual search engine. Which makes it a prime spot to get traffic to your blog. In fact, I don’t do any social media, just Pinterest.
It has totally paid off. While Google is having all these problems with algorithm changes and AI this year, Pinterest is going strong for me and many other bloggers.
*Note that Pinterest really works for Women’s lifestyle blogs in particular in the general lifestyle, home decor, beauty, fashion, recipe, etc. space. As the majority of the user base is female.
To start using Pinterest to drive traffic to your blog, first, click here set up a Pinterest business account.
Click to see more detailed instructions for this step:
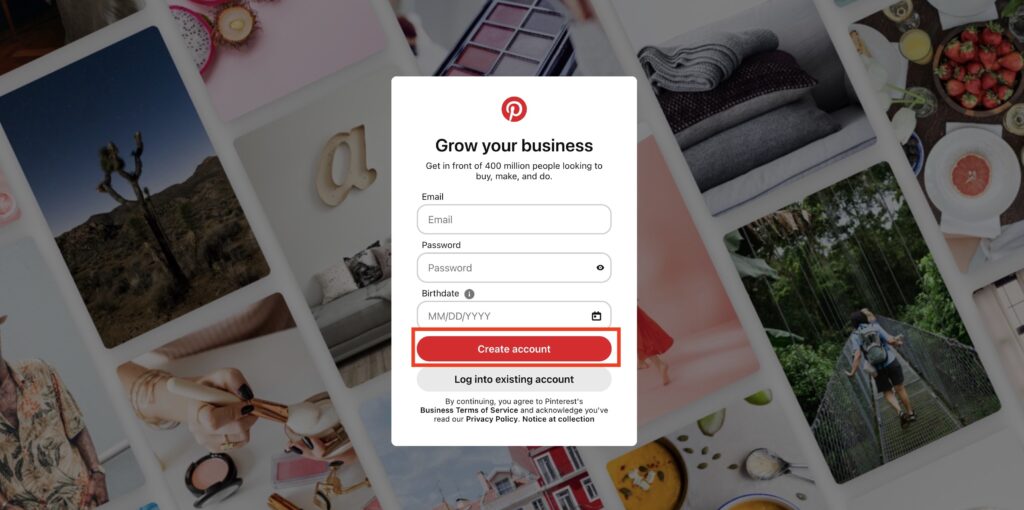
Click this link to sign up for a Pinterest Business Account. You should see this screen:
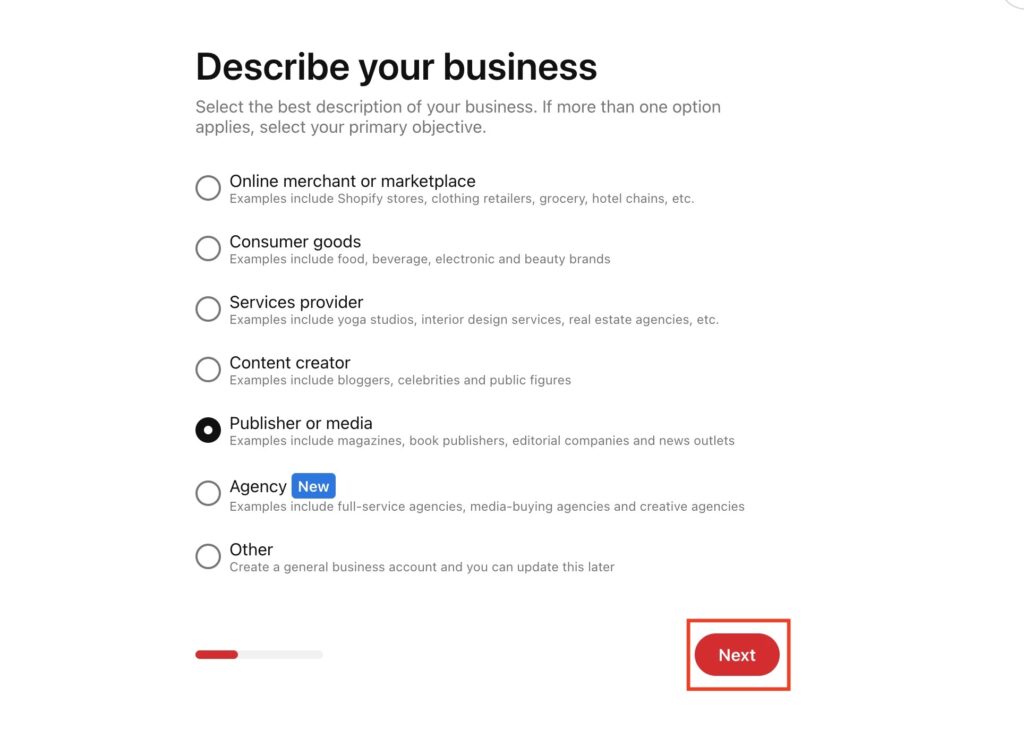
Select “Publisher of media” here (unless your business is something different) and then click “Next”.
Then enter your info including your new blog and click “Next”.
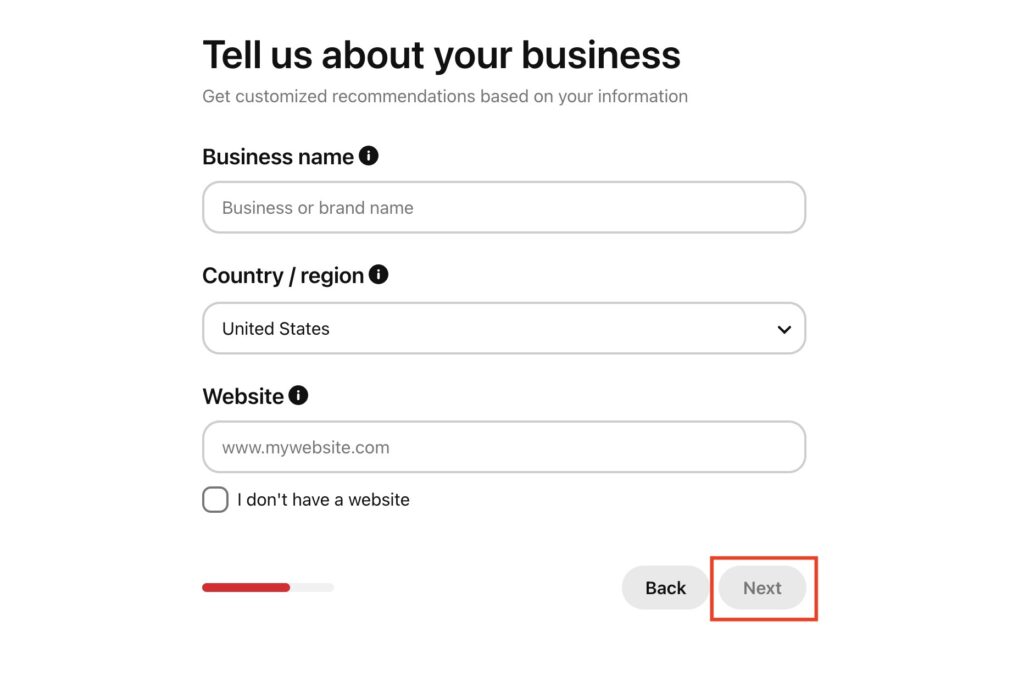
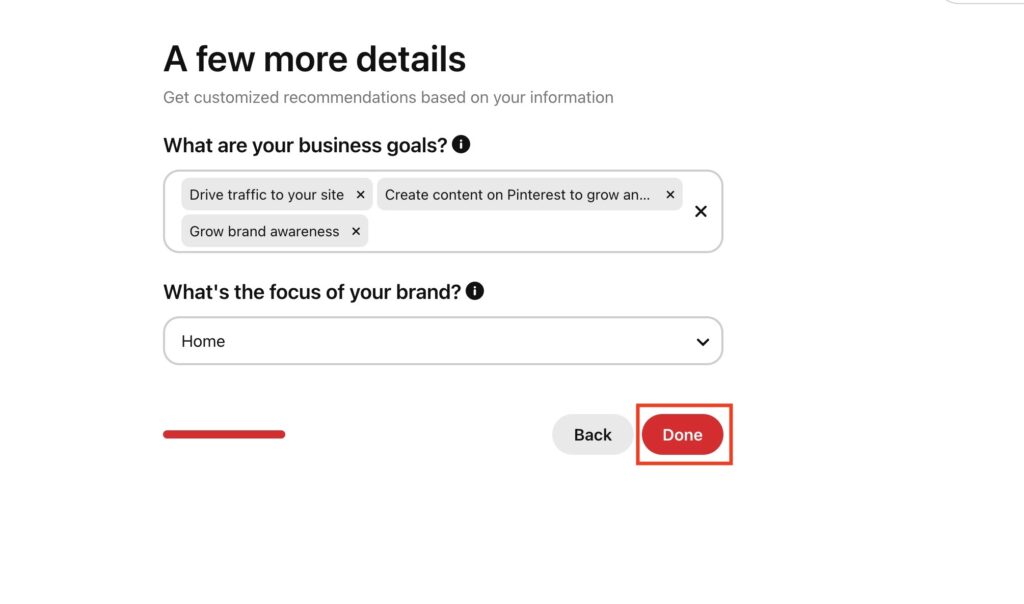
Set some goals, and choose a primary topic for your brand. The categories are a bit narrow, but I’m not sure how much it matters.
Then select “Showcase your brand” and “Next”
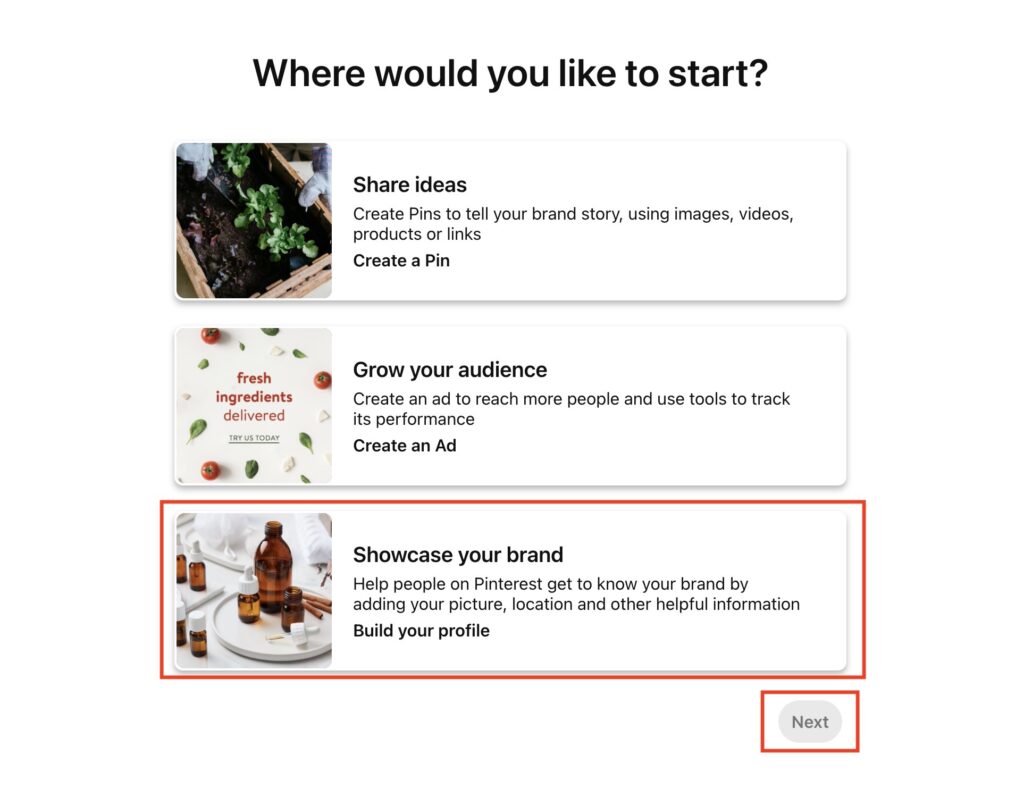
Hooray! You should be redirected to your new Pinterest business profile.
You should move on once you’ve created a Pinterest Business Account.
Using Pinterest to get blog traffic
Once your account is set up, it’s time to start using Pinterest. You’ll want to pin content from both other people and your own.
First, I would recommend creating some boards based on topics you plan on writing about. Things like “Summer fashion” or “Fall recipe ideas” work well. Start pinning other peoples content to these board just like you would on your regular Pinterest.
Here’s how:
On your Pinterest profile, you’ll see this little plus sign icon. Click on it, and then click “Board”.
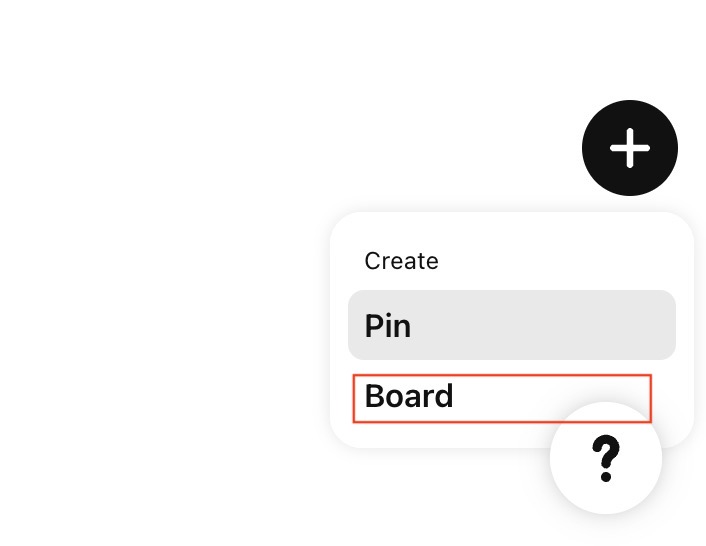
Give your board a simple title and select “Create”.
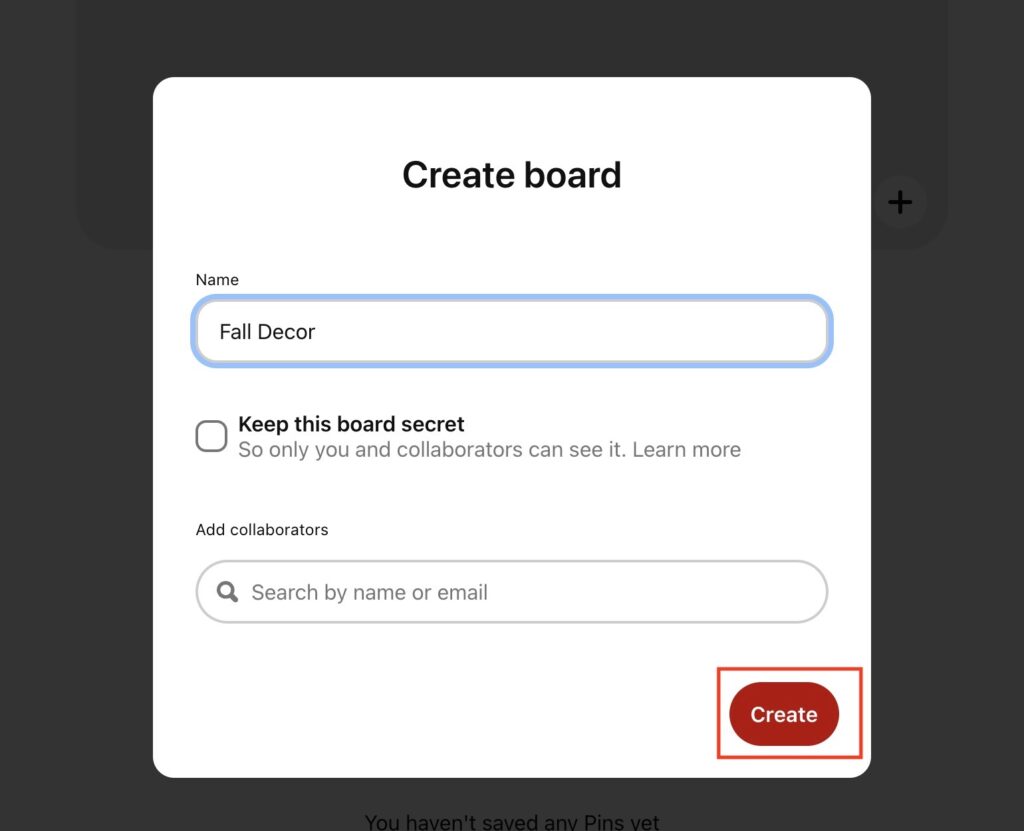
Pinterest will give you some inspiration based on the title you entered. If you like their suggestions, start adding some to your board, and then click “Done”.
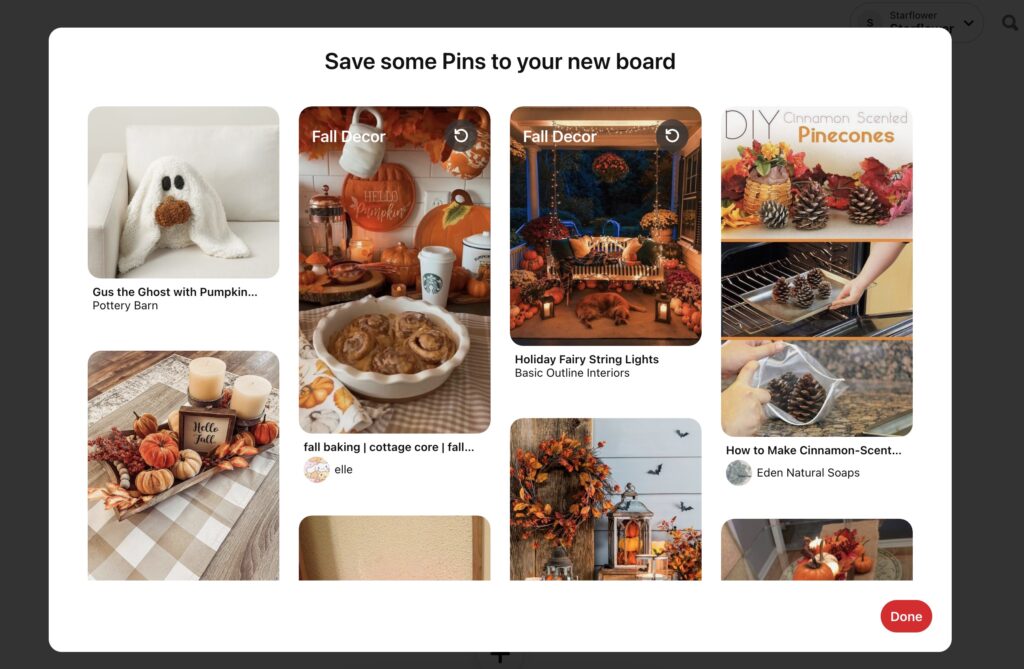
Then, you’ll have a board that looks like this:
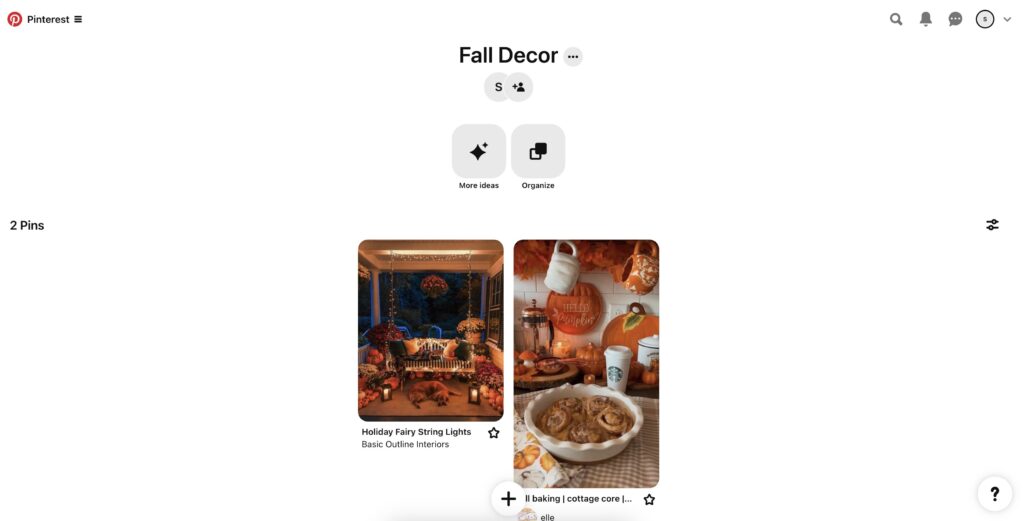
You’ll want to repeat this process for a few different boards to start filling out your profile. You should base this on the topics you think you’ll write about.
Once you’ve made some boards, your profile will look like this:
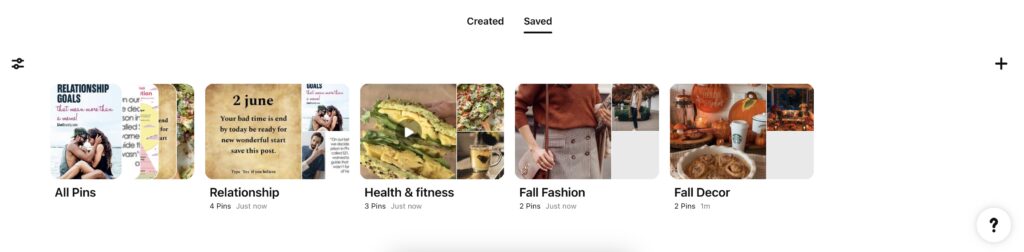
You should continue to add new boards and pins from other peoples’ content over time!
When you are ready to promote your own content on Pinterest, you can create your own pins and save them to these same boards. This is how people will find your content!
First, you’ll need to create pins in a design software like Canva (if you signed up earlier, this is another main way I use Canva). They have a ton of templates for your pins you can easily add your own images and titles to.
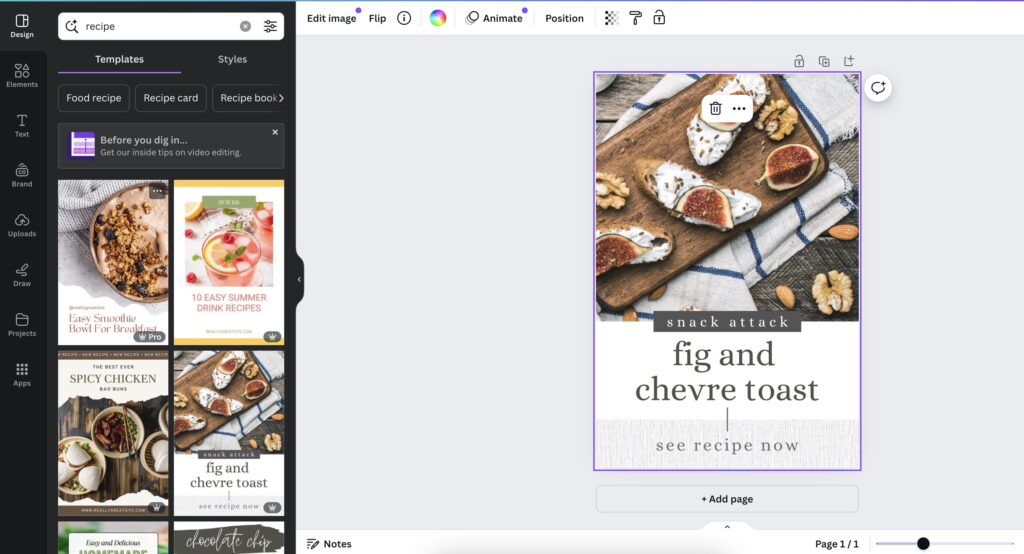
My rule of thumb is to start with at least 10-15 pins for one blog post. Download these as either PNG or JPEGs when you are done.
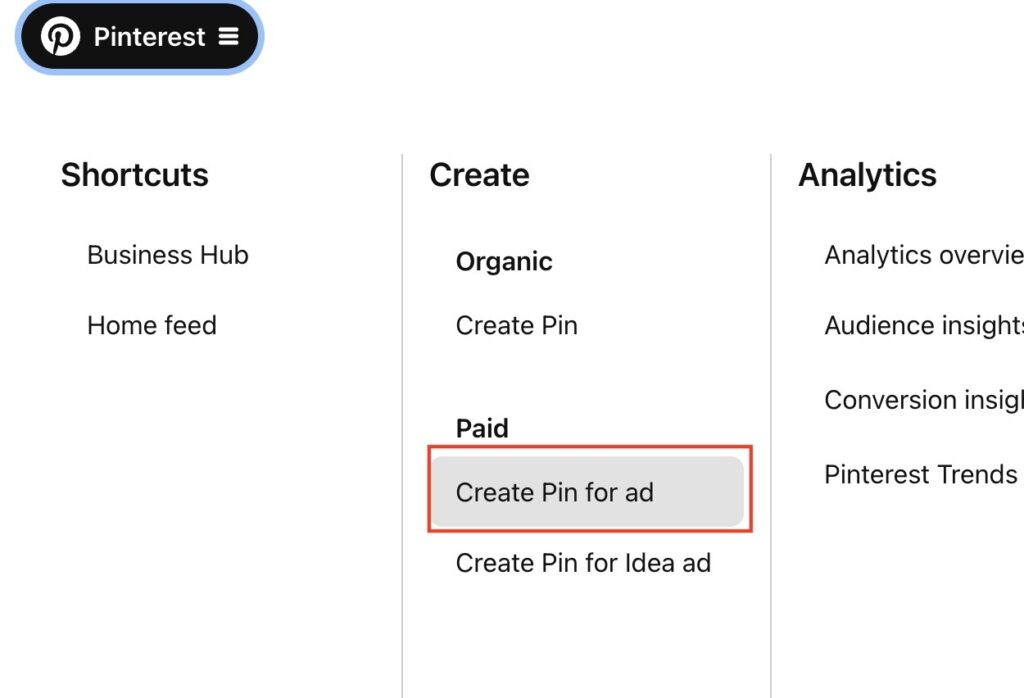
Then, on your Pinterest Business account, click the top left hand menu and select “Create pin for ad”.
Drag all of the pins you just created into the editor.
Add a link to your blog post, title, and description for each pin (I typically just use the first few sentences of the post).
You can also bulk edit if you’re uploading multiple pins.
If you’re adding multiple pins, you’ll also want to use the schedule feature to space your pins apart so they don’t publish all at once. You can pin up to 30 ish pins per day, however I would not recommend doing so if they are all linking to the same blog post. I’d recommend spacing out your pins so you are publishing one a day.
Once you’re ready, select a relevant board to add your pin to, and click “Publish”.
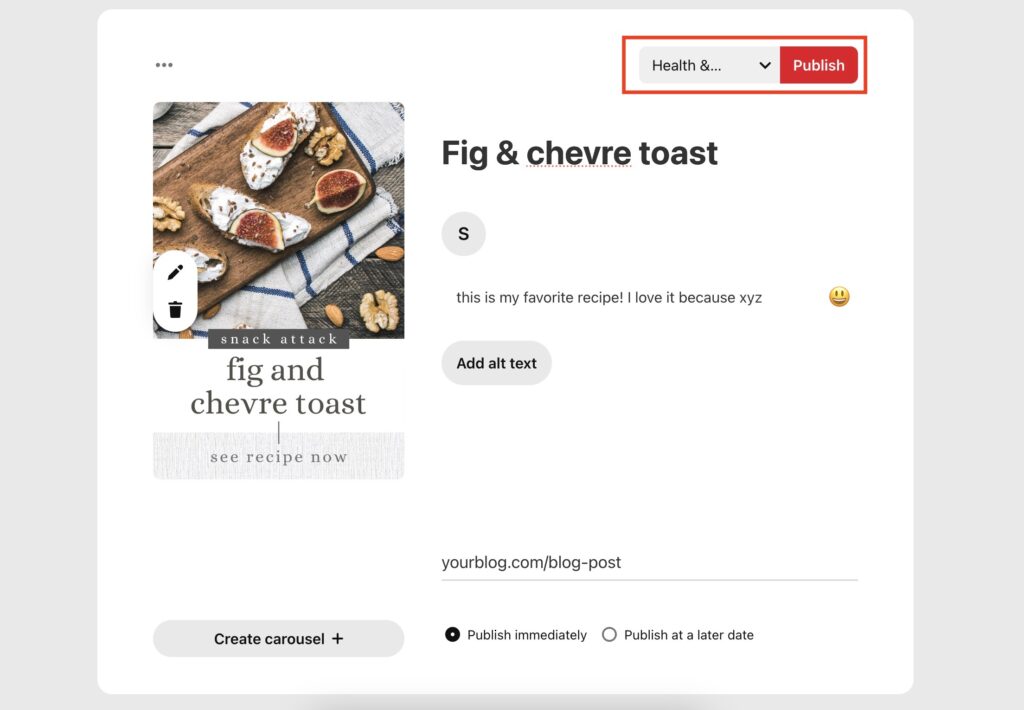
Now, people will be able to find your blog on Pinterest. It may take some time, but if you create quality content on Pinterest, people will find your blog through this method!
There are great tracking tools available in your Pinterest Business account where you can see how your Pinterest content is doing, I found this super motivating in the beginning of my journey.
You’ll want to add pins for every single blog post. Once you get in the swing of things, you can do this in batches. For example, I try to create 60-80 pins every week for both new and old content and just schedule it all at once.
Setting up Google analytics
You’ll also need a way to know if people are visiting your website and what pages. This is where Google Analytics comes in handy.
To set up Google analytics on your blog, follow these steps:
In your WordPress dashboard, click on “Plugins” in the left hand sidebar.
Then click “Add New Plugin”
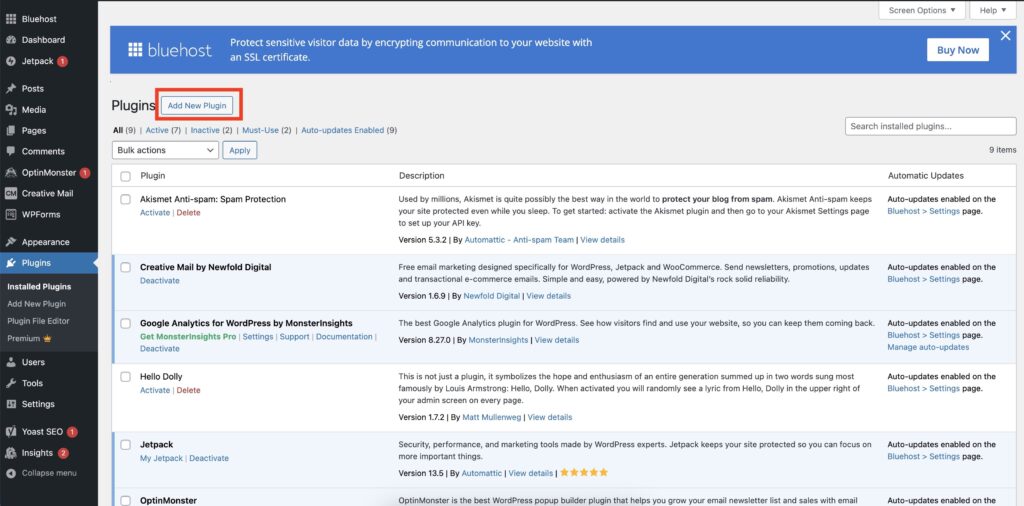
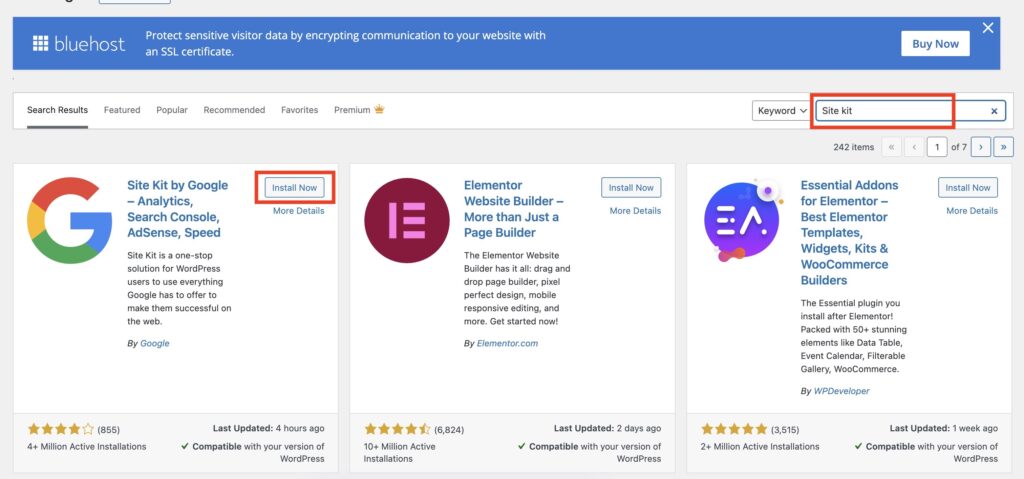
Search for “Site kit” and then Install the first one by Google. Once it’s installed, click “Activate”.
You should see this banner pop up. Click “Start setup”.

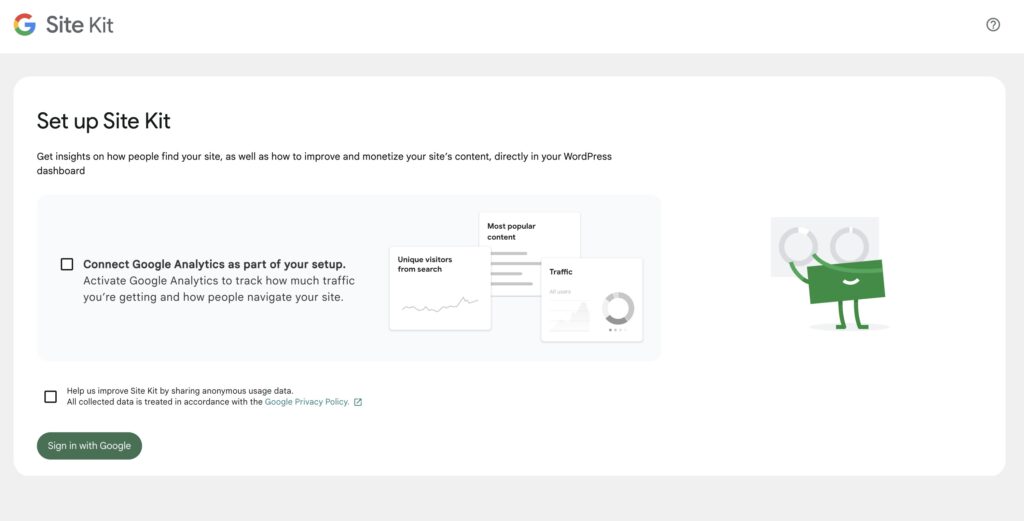
Select the option to connect Google Analytics and then click “Sign in with Google.”
I’ll leave you here on this one! Google’s onboarding will help you get analytics set up.
Setting up your Email list
The last step of today’s lesson is to set up an email list. Trust me, you’ll want to do this early on! So many bloggers wish they started their list earlier.
Email can be an amazing traffic source because it completely cuts out the middle-man— you can reach your readers via their inbox directly.
I use Convertkit for my email list. I love it because it’s super easy to use and It’s also free until you hit a certain amount of subscribers, so perfect for beginners.
To create a Convertkit account, click here.
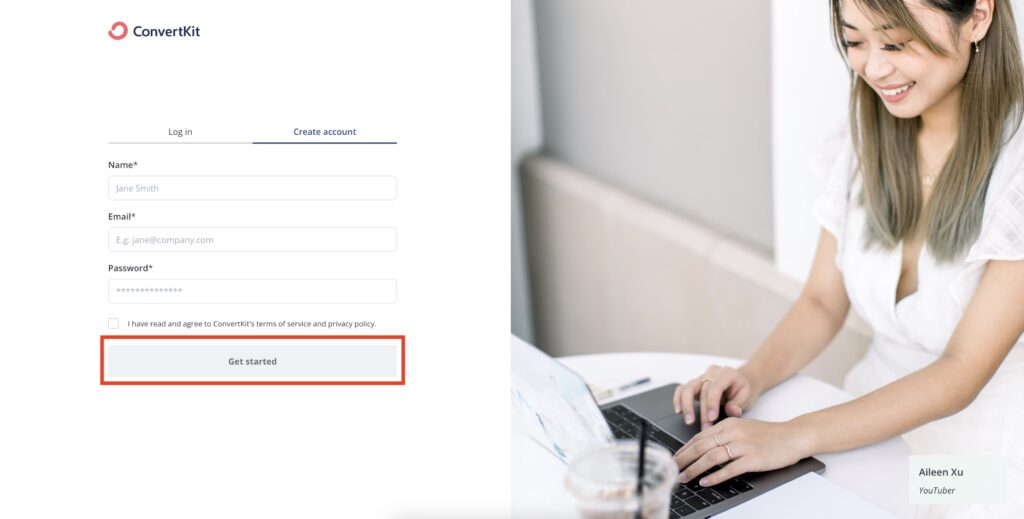
Once you’ve clicked the link to create your Convertkit account, enter your info and click “Get started.”
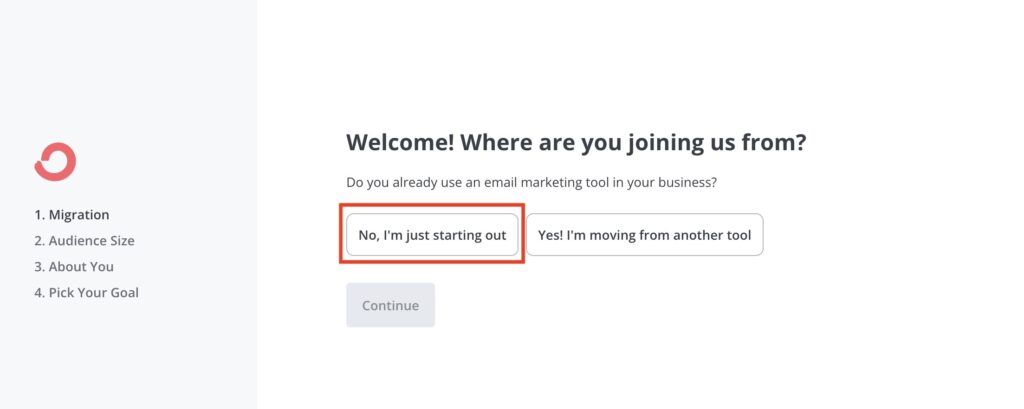
Select “No, I’m just starting out” and then click “Continue”.
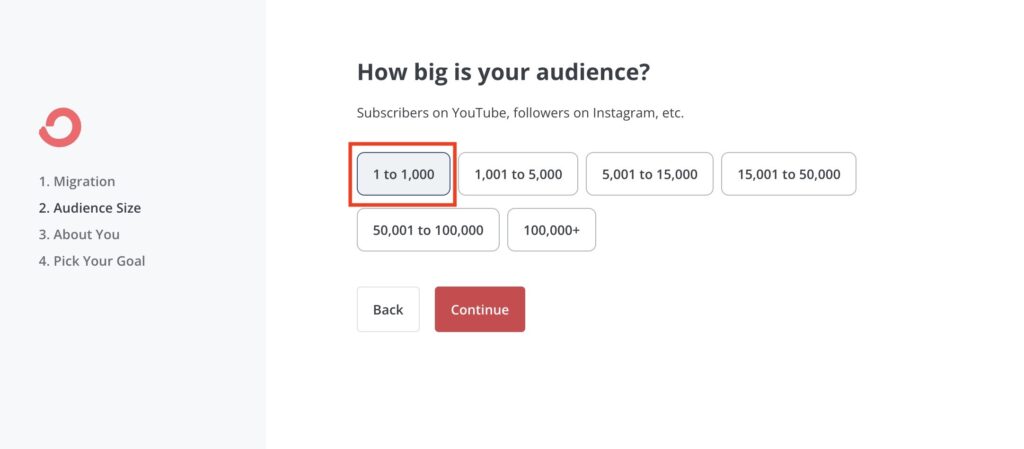
Add the size of your audience, and then click “Continue”.
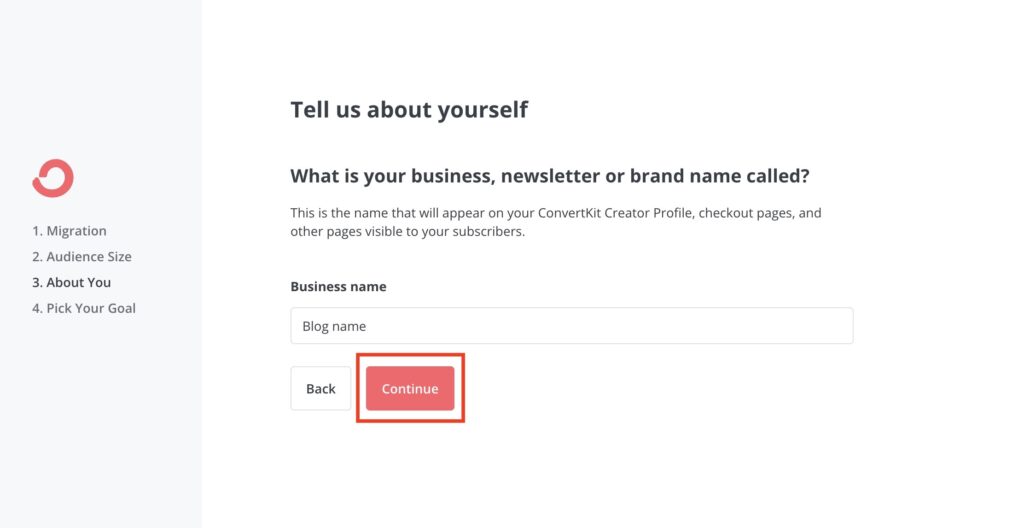
Add the name of your blog and click “Continue”.
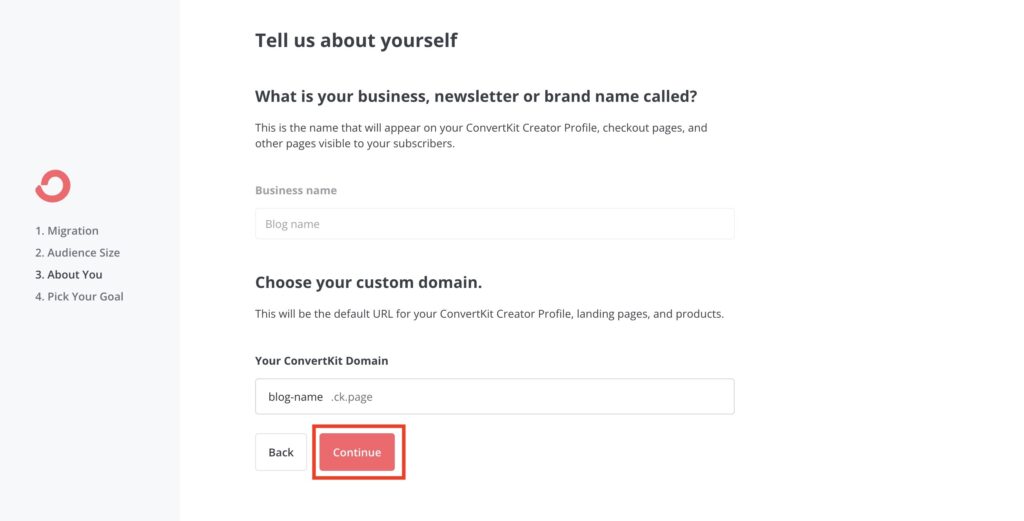
You likely won’t need to use Convertkit’s domain name, since you have your own, so you can just click “Continue”.
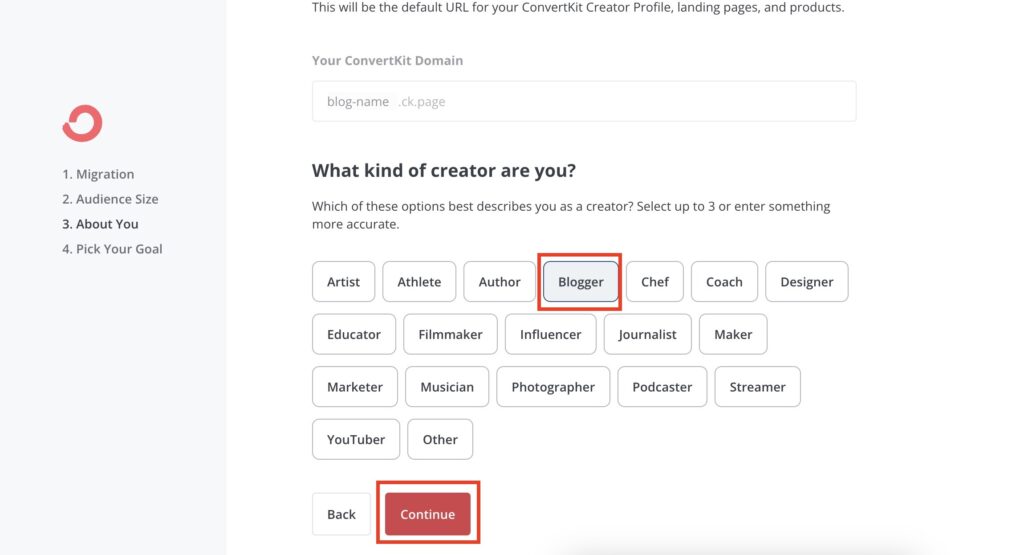
Select “Blogger” here and then “Continue”.
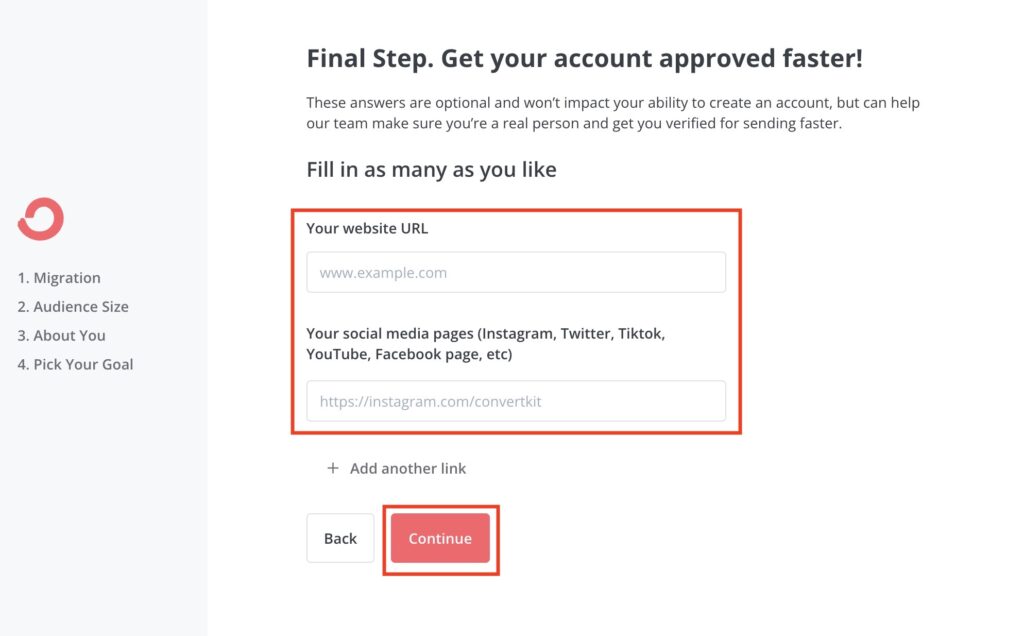
Add your new blog’s URL and Pinterest account. Then click “Continue”.
Definitely recommend watching the intro video here! Then click “Get started.”
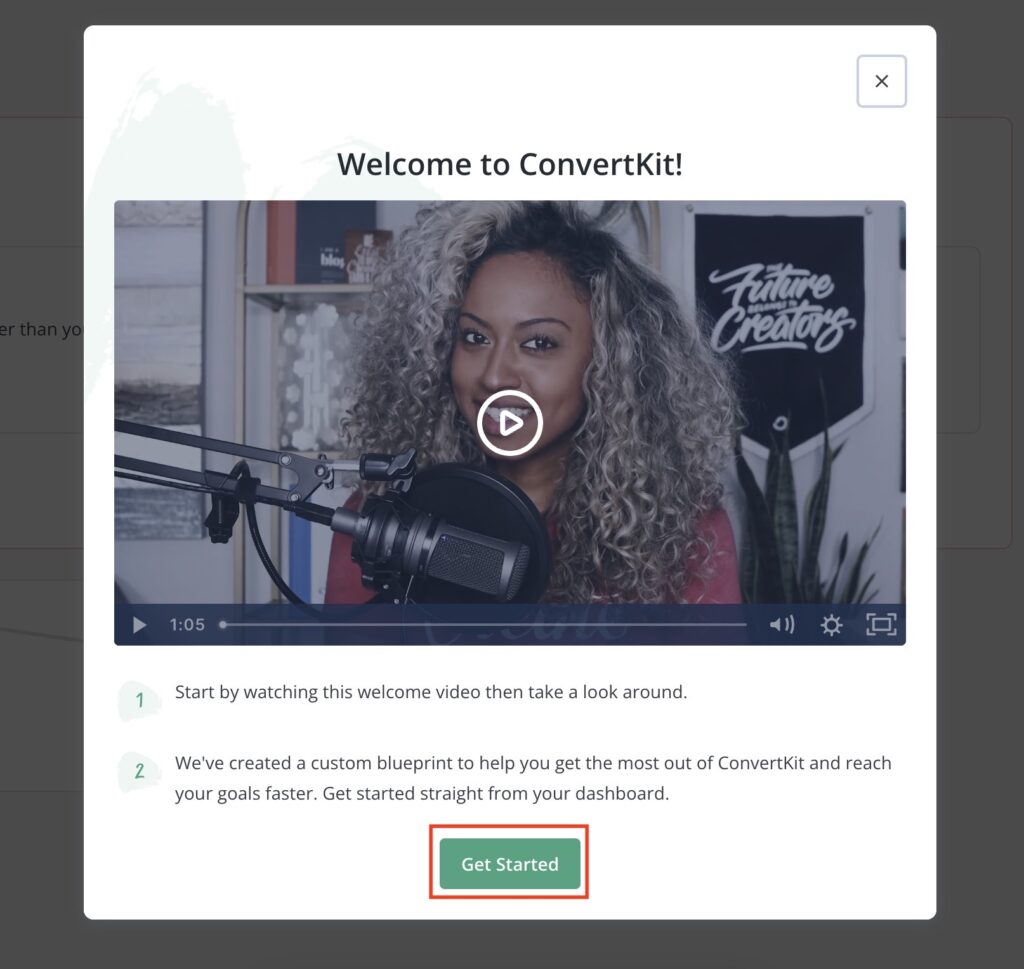
Now, you have a Convertkit account! This is what you will use to build your email list.
Convertkit allows you to create landing pages and forms which you can embed in your blog posts and pages.
I’ll show you the basics of creating your first email form:
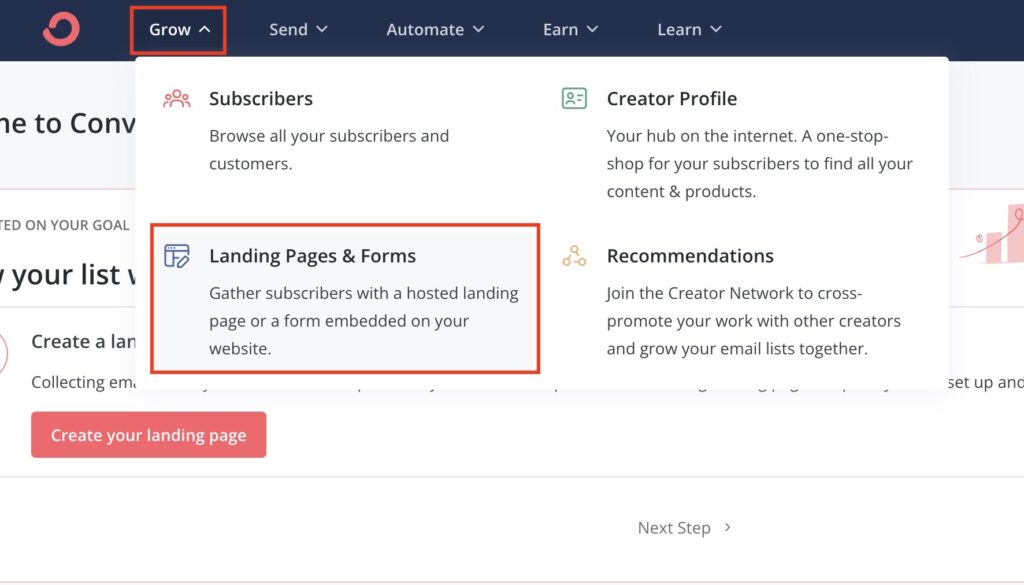
Once you’ve created your account, click “Grow” in the top left corner, and then click “Landing pages & forms”.
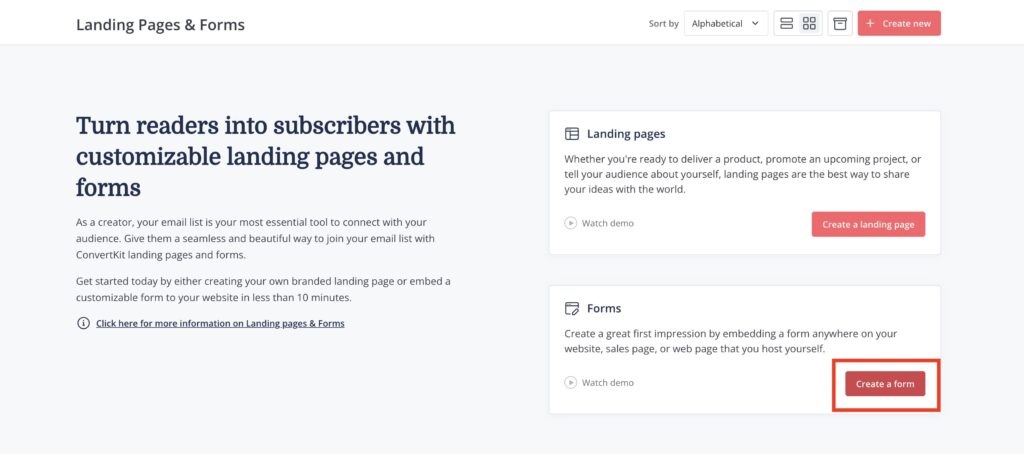
For your blog, you’re likely going to rely on Forms rather than landing pages. These can be embedded into your posts and pages on your blog. Click “Create a form”.
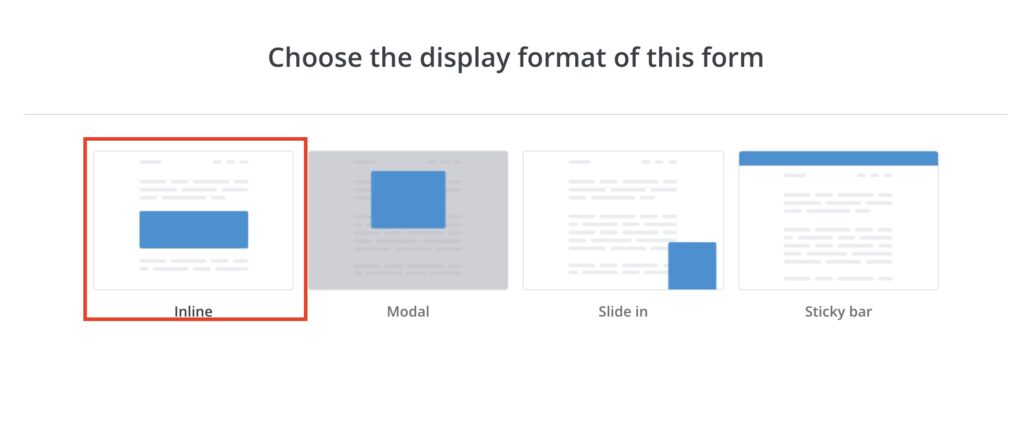
Convertkit offers different formats which all work with WordPress which is super cool! For a form embedded in your blog post, click “Inline”.
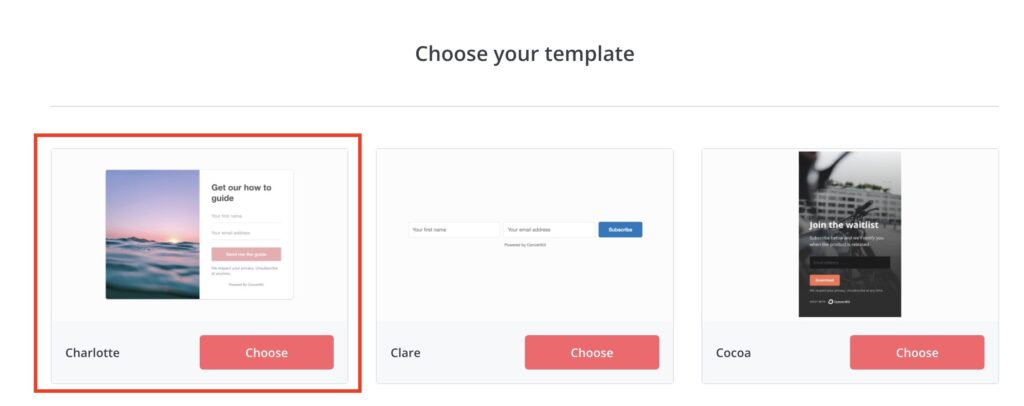
Now you can choose from the templates, based on which one you think will look best on your blog. Keep in mind everything is customizable. Click “Choose”.
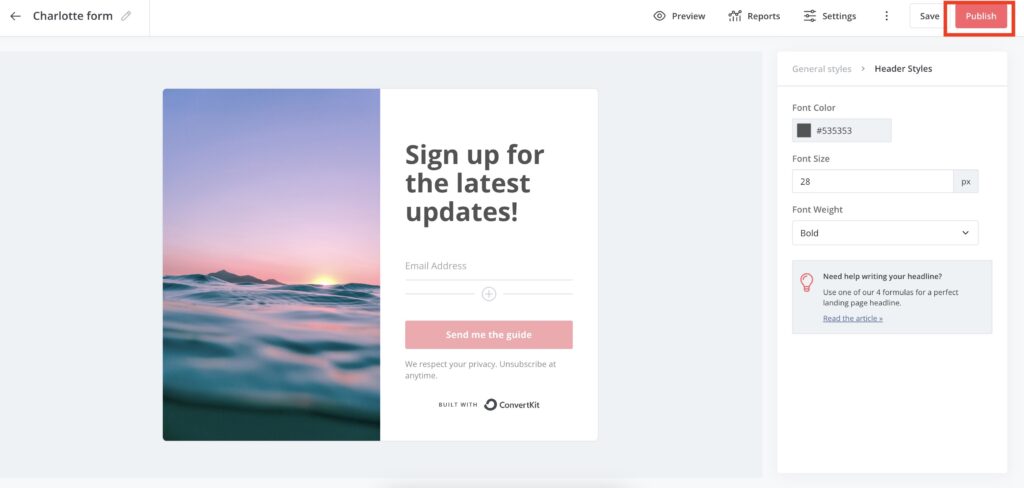
Now you can customize the template! You can keep it simple and just say something like “Sign up for the latest updates!” or you can incentivize readers to subscribe to your newsletter by offering freebies and information not available to just anyone on your blog. This can all be set up in Converkit.
When you’re ready, click “Publish”.
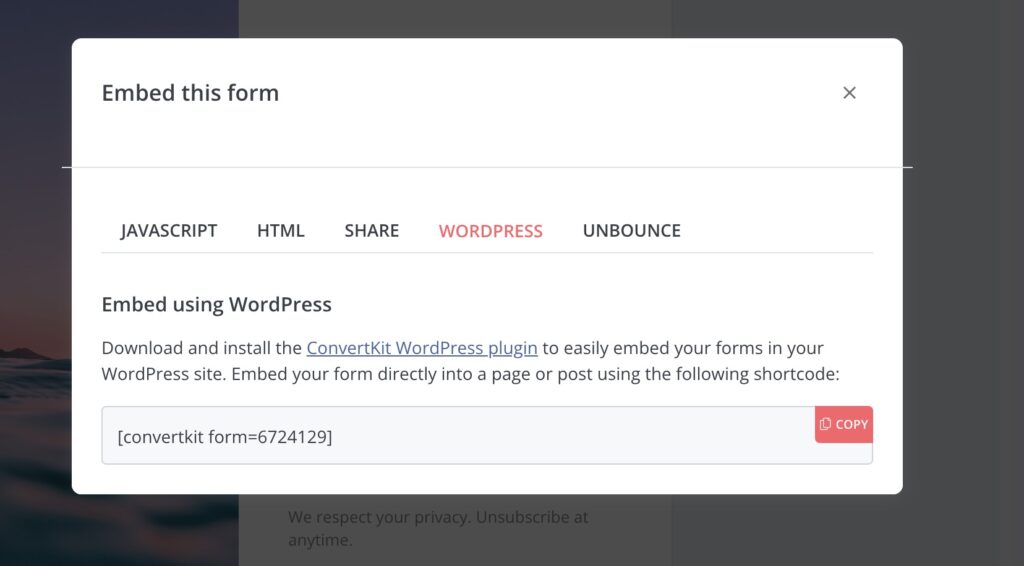
This popup will appear with what’s called a shortcode. This can be added anywhere in the WordPress block editor by adding the block called a shortcode (try typing “/shortcode”).
You can copy and paste this to embed your new email form in any blog posts or pages.
To start, I’d recommend adding email sign ups on your blog’s homepage and sidebar.
You can also use the Convertkit WordPress plugin to embed forms.
When readers view content with your ConvertKit forms embedded, they’ll be able to enter their email address and sign up to get updates from you. You can use this to drive traffic to your site and sell products in the future.
That’s it! In today’s lesson, you’ve already taken the first steps to getting people to read your blog. I wouldn’t be surprised if you start getting a few Pinterest impressions within just a couple of weeks from here! (I was surprised how fast you can grow).
Tomorrow is the last day of the course, and we will talk about everyone’s favorite topic (Making MONEY 💰)